Thursday, September 8, 2011

CASE of the Mini

I just love the wreath in the new Holiday Mini, don't you? So, I had to try it for myself. What do you think?


and a close up -


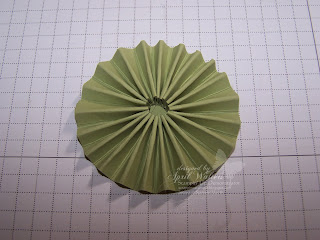
After a few of the rosettes, I thought there had to be an easier way. This is what I came up with - a template to hold them in place. I cut 2 1/4" circles out of some (3 actually) scrap pieces of card stock and stacked them on top of each other.-

Then, once you have your rosette folded and in place, put it inside the hole face down. This way you can hold it in one place with only one finger.

Place a generous amount of hot glue on the back.

Then take a 1 3/4 circle punched out of card stock and place on top.

All done

Sunday, March 13, 2011

Workshop Projects

This is one of the cards we will be making at an upcoming workshop I'm having on Monday. I over looked this set several times and finally decided to use some hostess benefits to get it. For a workshop, it's a nice way to show off several of the accessories in the Stampin Up catalogs.

Saturday, March 12, 2011

March Club Projects

Our first card for club this month was a simple Easter Card. I was inspired by a card I found on one of my favorite blogs - but, do you think I can find it now?? Of course not, so I'm sorry I can't give proper credit :(


The second card uses the shimmered block technique. I saw this on LeeAnn Greff's blog and used it in my Technique Club last month and decided to share with all my other club members.


I waited a long time to try this out, because I thought it would be so difficult and time consuming. Boy, was I wrong!! I love these cards. They are a great way to use scraps and the beautiful designer paper that Stampin Up has to offer!!

Sunday, February 6, 2011

1st Ever Card Buffet - Class #1 Today!!


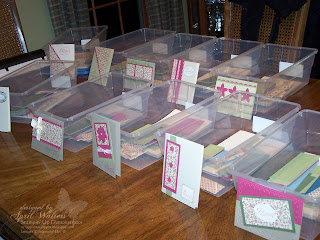
I'm so excited, I can't wait to see what everyone thinks of this idea. I have a total of 8 ladies confirmed between today and Wednesday. Since it's so hard to judge just how many of each design to make, I thought 20 of each card and when its gone it's gone. If I have left overs I can either save them or maybe the ladies will want to take some home to work on later.

I decided to take an idea that has been around for a quite a while - One Sheet Wonder. But, instead of 'stamping' the OSW, I used a sheet of Designer Series Paper and then added the coordinating card stock. Here's my twist - I used two full packs of Vintage Springtime Designer paper and cut those with the template. Then I added the layers with colors Rose Red, Baja Breeze, Pear Pizazz, Not Quite Navy and Always Artichoke. So, each box has five different designer papers to choose from (these are double sided, so really they have 10), neutral card base and three to five colored layers. I have a sample card out for them to use for the layout, but they get to choose their colors. There will also be a variety of other stamps out if they don't want my sentiment to choose from.

If anyone has any questions or would like the specifics for this class, please feel free to email me and I will send you the instructions.

Playing with MDS


One of my very good stamping customers is on the prom committee for her daughters class and they are looking for ideas for invitations. Her first thought was to actually stamp them all, but I suggested making them with MDS. This was my first sample for them....

Wednesday, February 2, 2011

Card Buffet Sneak Peak


I am having my first card buffet; one on Sunday and the other on February 9th. There will be ten card to choose from and enough supplies for 20 cards in each design. Each card will have several color combination's to choose from and you can add your sentiment.

February Club Projects


Build A Cupcake -


I didn't originally care for the whole cupcake them too much in the beginning, but they really are cute!! I saw a similar card on splitcoast stampers and thought it was perfect to show how adorable our new punch is.
I used Pink Pirouette, Real Red, Very Vanilla and Lap of Luxury DSP. You just can't make the cherries on the cupcake with out the all new Red Glitter Paper - love it!!!

Paper Flower in Vintage -

For this card I will be demonstrating how to make this beautiful paper flower!! We will also be using the Distressing Kit from the main catalog.
I used Very Vanilla, Real Red, Basic Black and Newspaper Print DSP. The flower in on a 3 1/4" circle cut out with the Circle Scissors.

Faux Pinwheel Technique -

This is such an easy technique to duplicate!! I used Tempting Turquoise, Real Red, So Saffron, Old Olive & Play Date DSP.

Birthday 12X12 Page -

I thought it was time for a change to bright and cheery colors!!! I started with a 6X6 So Saffron, then increased it to an 8 1/2 X 11 on Real Red and finished it on a 12X12 Pacific Point. The page is accented with the Build A Bear DSP, Star and Build A Cupcake Punches.

Pinewood Derby

Before I share some stamping projects, I wanted to "brag" about my little guy ;) This past Saturday was his very first Pinewood Derby with his Cub Scout Pack 007. He took first place!! We now get to move onto Districts on February 26. Look how happy he is.....